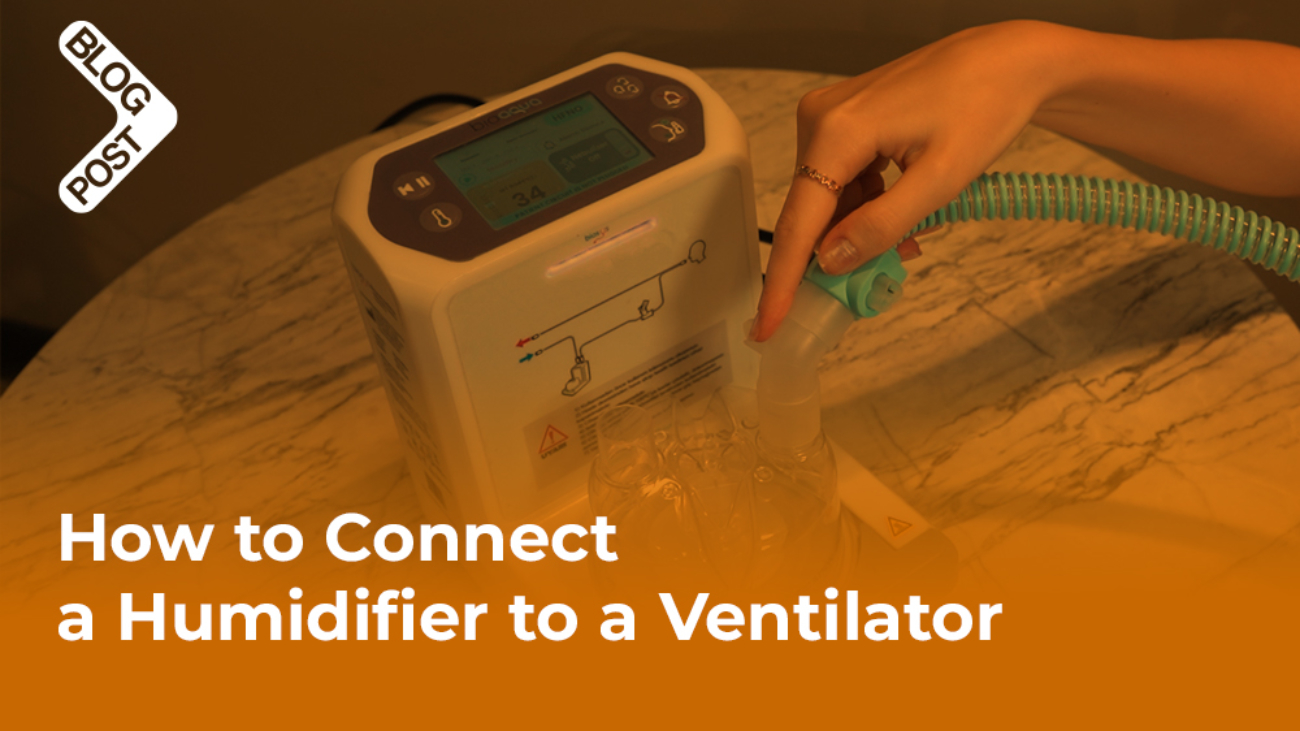
Connecting a humidifier to a ventilator is essential to maintain optimal airway humidity and improve patient comfort. Proper integration helps prevent complications like dryness and mucosal irritation. In this guide, we’ll cover the basic steps to safely and effectively connect a humidifier to a ventilator.
Preparation Before Connecting a Humidifier to a Ventilator
Before connecting a humidifier to a ventilator, it’s crucial to follow proper procedures to ensure patient safety, system efficiency, and equipment functionality. This preparation includes taking safety precautions and ensuring that all necessary equipment and tools are available and properly functioning (3).

Safety Precautions
A. Infection Control
- Hand Hygiene: Ensure thorough hand hygiene before and after handling any ventilator or humidifier components to reduce the risk of contamination.
- Sterile Equipment: Use only sterile or single-use components (e.g., tubing, water reservoir) to prevent bacterial contamination.
- Closed Circuit: Keep the circuit closed to minimize the risk of infection, especially for patients who are mechanically ventilated.
- Use of Sterile or Distilled Water: Fill the humidifier reservoir with sterile or distilled water to prevent bacterial growth in the system.
B. Monitoring and Supervision
- Check Patient Settings: Verify the ventilator settings before connecting the humidifier. Ensure that tidal volume, pressure settings, and oxygen levels are within the required limits.
- Monitor Temperature: Make sure that the temperature and humidity levels are set to the recommended ranges to avoid airway burns (too hot) or inadequate humidification (too cold).
C. Avoiding Condensation (Rainout)
- Heated Wire Circuits: If using a heated humidifier, confirm that the heated wires in the tubing are functioning correctly to prevent condensation within the circuit, which can interfere with ventilation and increase infection risk.
- Proper Tubing Positioning: Keep the tubing slightly inclined, allowing any condensation that forms to flow back into the water chamber rather than towards the patient.
D. Equipment Inspection
- Check for Leaks: Ensure that there are no leaks in the ventilator tubing or around the connections, as leaks can lead to a loss of pressure and improper ventilation.
- Prevent Electrical Hazards: If using an electrical humidifier, ensure that the power supply is stable and there are no exposed wires or damaged components. Use grounded outlets to prevent electrical shocks.
E. Emergency Preparedness
- Emergency Disconnection Plan: Be prepared to quickly disconnect the patient from the ventilator if any malfunction occurs with the humidifier (e.g., overheating or water contamination).
- Backup Equipment: Have backup equipment, such as another humidifier or emergency respiratory support (e.g., manual resuscitator), ready in case of failure.
Necessary Equipment and Tools
A. Ventilator-Related Equipment
- Ventilator Unit: The mechanical ventilator should be set up and operational, with all settings configured for the patient’s needs (e.g., tidal volume, pressure, oxygen levels).
- Ventilator Circuit: Includes inspiratory and expiratory tubing, connectors, and a Y-piece that connects the patient to the ventilator.
- Filters: Bacterial/viral filters to protect the ventilator and humidifier from contamination by microorganisms.
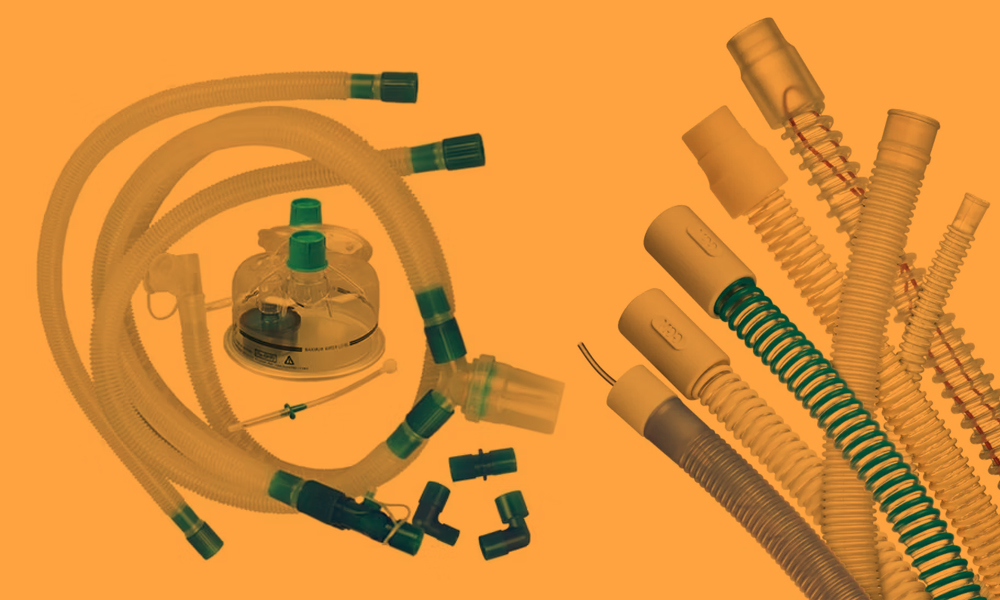
B. Humidification Equipment
- Humidifier (Heated or HME):
- For Heated Humidifiers: Ensure the water chamber, heating element, and control unit are present and functioning.
- For HMEs: Ensure the HME is sterile, sealed, and ready to connect between the endotracheal tube or mask and the ventilator circuit.
- Heated Wire Circuit: If using a heated humidifier, the tubing should have built-in heating elements to prevent condensation within the ventilator tubing.
- Water Reservoir: A sterile water container or chamber attached to the heated humidifier. The water level should be checked and filled as necessary before starting.
- Water Supply: Sterile or distilled water for use in the humidifier. Avoid tap water, as it may introduce contaminants.
C. Connection Tools
- Connectors and Adaptors: These are needed to attach the humidifier to the ventilator circuit and patient airway. Ensure the correct size and type (e.g., Luer-lock, Y-piece connectors) are available.
- Tubing Clamps/Clips: These are used to secure tubing and prevent disconnection or leaks in the circuit.
D. Monitoring Tools
- Temperature Probe: Used to monitor the temperature at the patient end of the ventilator circuit, ensuring the air is adequately warmed and humidified.
- Humidity Sensor: Some advanced humidifiers or ventilators come with built-in humidity sensors to measure and adjust the humidity levels in real-time.
- Oxygen Analyzer: If oxygen therapy is being administered, an oxygen analyzer is used to verify the concentration of oxygen being delivered.
E. Backup and Emergency Equipment
- Manual Resuscitator (Ambu Bag): For immediate manual ventilation in case of ventilator or humidifier failure.
- Backup Humidifier or HME: In case the primary humidifier malfunctions or needs to be replaced, having a backup ensures continuous humidification.
- Spare Tubing and Filters: Extra tubing and filters should be readily available in case of damage or contamination during setup or use (4).
In conclusion, proper preparation before connecting a humidifier to a ventilator involves thorough inspection of equipment, adherence to infection control protocols, and careful monitoring of the system to ensure optimal patient care. Following these steps can prevent complications such as infection, condensation, and equipment malfunction.
Step-by-Step Process for Safe Connection

- Inspect the Ventilator and Humidifier:
- Ensure that both the ventilator and humidifier are in good working condition, have been calibrated, and are set to the appropriate values for the patient.
- Set Up the Water Chamber:
- For heated humidifiers, fill the water chamber with sterile or distilled water and check that the heating element is operational.
- Connect the Circuit:
- Attach the inspiratory and expiratory tubing to the ventilator. Ensure all connectors are tight and secure to avoid air leaks.
- Insert the HME or Humidifier:
- If using an HME, place it between the ventilator tubing and the patient’s endotracheal tube, tracheostomy, or mask.
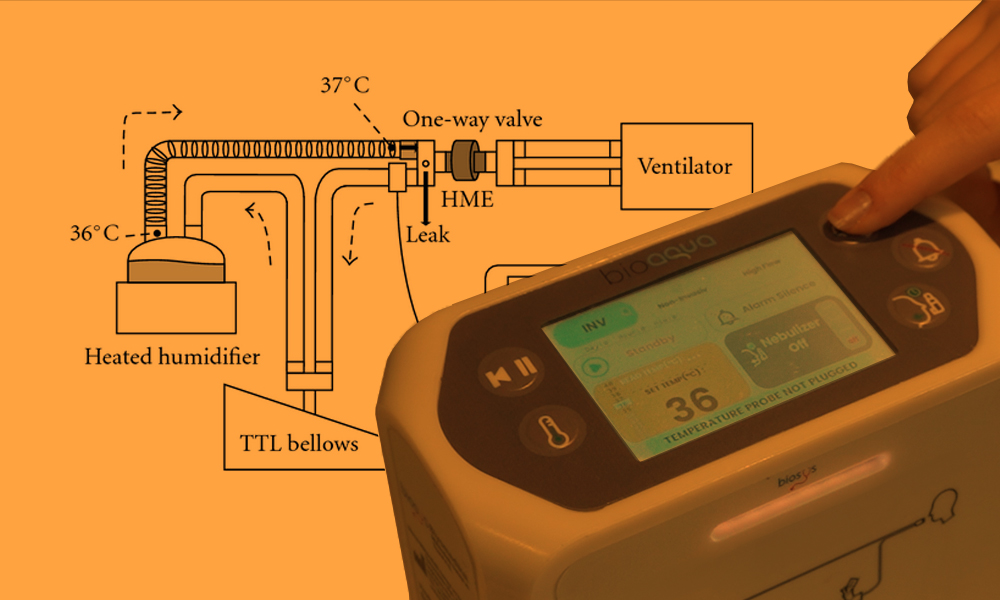
- If using a heated humidifier, connect the tubing from the ventilator to the humidifier’s output, and from the humidifier to the patient’s airway.
- Check Humidification Settings:
- Set the desired temperature and humidity on the humidifier (for heated humidifiers). Ensure these are within the recommended range, typically 37°C for temperature and 30-34 mg/L for absolute humidity.
- Monitor and Adjust:
- Continuously monitor the system, checking for appropriate temperature, humidity, and oxygen levels. Adjust the settings as necessary to ensure patient safety and comfort.
Humidifier Testing and Adjustments
Once the humidifier is connected to the ventilator, it is essential to perform thorough testing and make necessary adjustments to ensure proper functioning. This process includes checking for leaks, adjusting humidity levels, and continuously monitoring the patient’s comfort and safety. Each of these steps is critical to ensuring the efficiency of the ventilator-humidifier system and preventing complications (2).
1. Checking for Leaks
Leaks in the ventilator or humidifier system can reduce the effectiveness of ventilation, alter pressure settings, and result in inadequate oxygen delivery. Detecting and fixing leaks early is essential for maintaining proper ventilation support.
Steps for Checking Leaks:
- Visual Inspection:
- Before starting ventilation, visually inspect all connections in the circuit (e.g., between the ventilator, humidifier, and patient) for loose fittings or disconnected tubing.
- Ensure that all connectors, clamps, and seals are secure.
- Leak Test on the Ventilator:
- Most modern ventilators have a built-in leak test function. Activate the test via the ventilator’s control panel, and it will simulate pressure within the circuit to detect any air leaks.
- The system will notify you if there is a significant leak in the circuit.
- Monitor Pressure Readings:
- During ventilation, closely monitor the airway pressure. Unexplained drops in pressure may indicate a leak.
- If the ventilator’s pressure alarms are triggered frequently (e.g., low-pressure alarms), it could signal a disconnection or leak in the tubing or humidifier system.
- Tighten and Secure Connections:
- If a leak is detected, recheck the tubing, connectors, and seals. Tighten any loose connections or replace defective components (e.g., cracked tubing or worn-out connectors).
- Check Water Chamber and Ventilator Seal:
- Ensure that the water chamber in the heated humidifier is properly seated and sealed to prevent leaks around the humidifier.
Final Leak Test:
- After addressing any potential leak points, conduct a final ventilator leak test to verify that all issues have been resolved and the system is fully sealed.
2. Adjusting Humidity Levels
Maintaining appropriate humidity levels is vital for preventing airway dryness, reducing secretion buildup, and ensuring patient comfort. Too little humidity can lead to airway irritation, while excessive humidity can cause condensation in the circuit and increase the risk of infection.
Steps for Adjusting Humidity:
- Initial Settings:
- Heated Humidifier: Start by setting the humidifier to a temperature of 37°C, which typically provides adequate humidification without overheating. Humidity levels should range between 30-34 mg/L (absolute humidity).
- HME (Passive Humidifier): HMEs do not allow for direct adjustment of humidity but rely on the patient’s own exhaled moisture and heat to humidify the inhaled air. Ensure the HME is functioning properly by checking that it is warm after a few breaths.
- Monitoring Humidity Output:
- Many modern ventilators and humidifiers have sensors that display real-time humidity levels. Regularly monitor these readings to ensure the humidity is within the recommended range.
- Place a temperature probe near the patient’s airway (typically at the end of the circuit) to ensure the gas delivered is at the correct temperature and humidity level.
- Adjusting for Condensation (Rainout):
- If you notice condensation forming in the ventilator tubing (often called “rainout”), reduce the temperature slightly or use heated wire circuits to keep the air warm and prevent moisture from cooling and condensing.
- Adjust the ambient room temperature, if necessary, to reduce condensation. A colder room may cause more moisture to collect inside the tubing.
- Patient-Specific Adjustments:
- Increased Humidity Needs: If the patient has thick secretions or dry airways, you may need to increase the humidifier temperature slightly (within safe limits) to add more moisture to the air.
- Decreased Humidity Needs: If the patient is experiencing excessive secretions or condensation, decrease the temperature or switch to an HME to reduce moisture levels.
3. Monitoring Patient Comfort and Safety
The comfort and safety of the patient are the primary concerns in mechanical ventilation. Proper monitoring ensures that the humidifier and ventilator are functioning correctly and that the patient is receiving adequate, safe care (1).
Steps for Monitoring:
- Observe Patient Comfort:
- Signs of Dryness: If the patient exhibits signs of dry mouth, throat discomfort, or dried secretions, the humidity levels may be too low. Adjust the humidification settings accordingly.
- Signs of Over-Humidification: Look for signs such as excessive secretions, coughing, or discomfort, which may indicate over-humidification. Condensation in the tubing can also suggest that humidity is too high.
- Monitor Respiratory Status:
- Check the patient’s respiratory rate, tidal volume, and oxygen saturation (SpO₂) regularly to ensure that ventilation is effective and stable.
- Watch for signs of airway obstruction, such as increased work of breathing, caused by mucus plugging due to inadequate humidity.
- Alarms and Ventilator Monitoring:
- Ensure that the ventilator’s alarms are set appropriately for detecting any abnormalities in pressure, tidal volume, or oxygen levels.
- Respond promptly to any ventilator alarms, such as low-pressure or high-pressure alarms, which may indicate issues with the humidifier, tubing, or patient airway.
- Temperature Monitoring:
- Continuously monitor the temperature at the patient end of the circuit. The delivered gas should be approximately body temperature (37°C).
- Ensure the humidifier’s heating element maintains the desired temperature and adjust if necessary to prevent overheating or under-heating.
- Check for Condensation in Tubing:
- Routinely check the tubing for signs of water buildup. If condensation forms, it can obstruct airflow and affect ventilation efficiency. In case of significant water accumulation, drain the tubing and readjust the temperature to prevent further condensation.
- Assess Secretions:
- Monitor the quantity and consistency of the patient’s secretions. If secretions become too thick, it may indicate insufficient humidification, requiring an increase in the humidity setting.
Patient Communication and Feedback:
- If the patient is conscious, ask them about their comfort level. Patients on non-invasive ventilation (NIV) may report dryness or discomfort if the humidity is not sufficient. Adjust based on their feedback.
Regular Equipment Check:
- Periodically inspect the humidifier, ventilator, and tubing to ensure all components are functioning correctly. Look for any signs of equipment failure, water contamination, or blockages in the tubing.
In conclusion, after connecting a humidifier to a ventilator, thorough testing and continuous monitoring are essential for ensuring the system’s effectiveness and the patient’s safety. Checking for leaks, adjusting humidity levels to suit the patient’s needs, and monitoring for comfort and safety ensure that the patient receives optimal respiratory support.
Adjust Humidity Levels and Troubleshooting for Humidifiers and Ventilators
Proper maintenance and timely troubleshooting are essential for ensuring the safe and effective operation of both humidifiers and ventilators in clinical settings. Regular cleaning, inspection, and awareness of common issues can help prevent complications and extend the lifespan of the equipment.
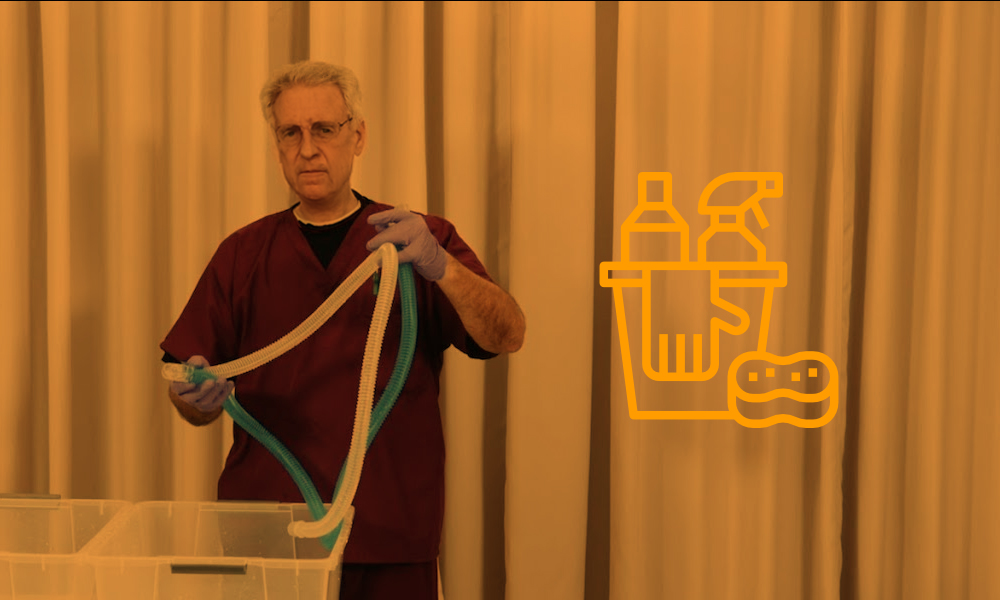
1. Regular Cleaning and Inspection
A. Importance of Cleaning
- Regular cleaning is vital to prevent bacterial growth, mineral buildup, and contamination in humidifiers, particularly in heated humidifiers that use water reservoirs. Ventilator circuits and components also need to be cleaned and replaced to maintain patient safety and proper equipment function.
B. Cleaning Schedule
- Water Chamber/Reservoir (Heated Humidifier)
- Daily Cleaning: If using a reusable water chamber, clean it daily with mild soap and warm water, and rinse thoroughly. Follow with sterilization as per manufacturer guidelines.
- Replace as Needed: Disposable water chambers should be replaced according to the manufacturer’s instructions (often every 24 to 48 hours).
- Ventilator Circuit Tubing
- Single-Use Tubing: Replace single-use ventilator circuits after each patient or as per infection control protocols.
- Reusable Tubing: For reusable circuits, clean them daily, and sterilize them in accordance with hospital infection control standards. Ensure thorough drying before reassembling to avoid moisture buildup.
- Humidifier and Filters
- Humidifier Base: Wipe the exterior of the humidifier regularly to remove dust and dirt. Ensure the heating element is clean and free of mineral buildup.
- Filters: Replace bacterial/viral filters regularly. Follow manufacturer recommendations, typically every 24 hours, or sooner if they become visibly dirty or blocked.
- Heated Wire Circuits
- Heated wires in the ventilator circuit prevent condensation. Regularly inspect the wires for proper function and ensure that they are clean and free from any buildup or damage. Replace if necessary.
- Humidity and Temperature Sensors
- Inspect the temperature and humidity sensors for accuracy and cleanliness. Clean sensors carefully and recalibrate them as per the manufacturer’s guidelines.
C. Inspection Routine
- Daily Visual Check
- Inspect the tubing, humidifier, and ventilator circuit for any visible signs of wear and tear, disconnections, or leaks.
- Ensure that all connectors are secure and that there is no condensation buildup in the tubing (especially if heated humidifiers are in use).
- Monitor for Alarms
- Keep an eye on any alarms or alerts from the ventilator, as these can signal issues such as leaks, blocked tubing, or inadequate humidification.
- Temperature and Humidity Check
- Use a probe to regularly check the temperature and humidity levels being delivered to the patient. Compare the actual values to the set parameters to ensure the system is working correctly.
2. Common Issues and Solutions
A. Condensation or “Rainout” in the Circuit
Problem: Condensation (rainout) occurs when humidified air cools as it travels through the ventilator tubing, leading to water accumulation. This can obstruct airflow and potentially disrupt ventilation.
Solution:
- Use Heated Wire Circuits: Heated wire circuits prevent condensation by maintaining a consistent temperature throughout the tubing.
- Increase Room Temperature: Ensure the ambient temperature of the room is not too low, as cooler environments contribute to condensation.
- Check Humidifier Temperature Settings: Verify that the humidifier temperature is correctly set (typically around 37°C) to prevent cooling of the air as it travels through the circuit.
B. Inadequate Humidification
Problem: If the air delivered to the patient is too dry, it can cause airway dryness, discomfort, and increased secretion thickness, leading to blockages in the airway.
Solution:
- Adjust Humidifier Settings: Increase the humidification level on the humidifier to ensure proper moisture is delivered. Monitor the output to ensure it matches the target humidity level.
- Switch to Active Humidification: If using an HME, and the patient’s airways are dry, consider switching to a heated humidifier for more effective and continuous humidification.
- Monitor Water Chamber Levels: Ensure the water reservoir has adequate sterile water. Refill or replace the water chamber as needed.
C. Leaks in the Ventilator Circuit
Problem: Leaks in the ventilator circuit can reduce the pressure and volume of air delivered to the patient, compromising effective ventilation.
Solution:
- Check All Connections: Inspect all tubing connections, ensuring they are securely attached and free from cracks or damage.
- Perform a Leak Test: Use the ventilator’s built-in leak test feature to check for air leaks. Fix any detected leaks by tightening connectors or replacing damaged tubing.
- Replace Worn Components: If the tubing, connectors, or seals are worn out or damaged, replace them immediately to maintain system integrity.
D. Clogged Filters or Tubing
Problem: Filters or tubing can become clogged with secretions, dirt, or condensation, increasing airway resistance and obstructing airflow to the patient.
Solution:
- Replace Filters Regularly: Ensure that bacterial and viral filters are replaced as per the manufacturer’s instructions or when visibly soiled.
- Clean or Replace Tubing: If tubing becomes clogged with secretions or condensation, clean or replace it immediately to prevent airway obstruction.
- Monitor Secretions: If the patient has thick secretions, adjust the humidity level to prevent buildup in the tubing and ensure secretion mobility.
E. Overheating or Undercooling of Humidified Air
Problem: Overheating can cause burns to the airways, while undercooling may lead to inadequate humidification and discomfort for the patient.
Solution:
- Adjust Humidifier Temperature: Ensure the humidifier is set to a safe and effective temperature (around 37°C). Monitor the output temperature regularly using temperature probes.
- Check Temperature Sensors: Regularly inspect and recalibrate the humidifier’s temperature sensors to ensure accurate readings.
- Avoid Direct Sunlight or Heat Sources: Keep the ventilator and humidifier away from heat sources or direct sunlight, which could interfere with temperature control.
F. Inaccurate Temperature or Humidity Readings
Problem: The ventilator or humidifier may show incorrect humidity or temperature readings due to sensor malfunctions or calibration issues.
Solution:
- Recalibrate Sensors: Recalibrate temperature and humidity sensors according to the manufacturer’s guidelines. This will help ensure accurate monitoring.
- Replace Faulty Sensors: If recalibration does not resolve the issue, replace faulty sensors with new, calibrated units.
G. Humidifier Not Heating Properly
Problem: The heated humidifier fails to warm the water properly, resulting in insufficient humidification.
Solution:
- Check Power Source: Ensure the humidifier is plugged into a reliable power source and that the heating element is functioning correctly.
- Inspect the Heating Plate: If the heating plate is dirty or has mineral deposits, clean it according to manufacturer instructions or replace it if damaged.
- Replace the Humidifier Unit: If the humidifier continues to malfunction, it may be necessary to replace the unit to ensure proper heating and humidification.
In conclusion, maintaining a humidifier and ventilator system requires regular cleaning, inspection, and timely troubleshooting to ensure efficient and safe operation. By following a structured maintenance routine and understanding common issues and their solutions, healthcare professionals can prevent complications, extend the lifespan of equipment, and ensure optimal patient care.
Conclusion
- Regular Cleaning and Inspection:
- Daily Cleaning: Clean and sterilize reusable components like water chambers and tubing, and replace disposable parts (e.g., filters and HMEs) as needed.
- Sterile Water Use: Always use sterile or distilled water in heated humidifiers to avoid contamination.
- Inspect Equipment: Check all connections, tubing, and humidifiers daily for signs of wear, leaks, or blockages. Perform visual inspections and run ventilator leak tests to ensure system integrity.
- Common Issues and Solutions:
- Condensation (Rainout): Prevent condensation buildup by using heated wire circuits, adjusting humidifier settings, and controlling room temperature.
- Inadequate Humidification: Monitor and adjust humidity levels to avoid airway dryness and ensure patient comfort. Switch to a heated humidifier if needed.
- Leaks in the Circuit: Conduct leak tests and secure all connections. Replace worn or damaged tubing and connectors.
- Clogged Filters or Tubing: Regularly replace filters and clean tubing to prevent blockages that could compromise ventilation.
- Overheating or Undercooling: Ensure proper temperature control by regularly calibrating sensors and adjusting humidifier settings.
- Humidifier Not Heating Properly: Check the power source and heating elements, and replace faulty components if necessary.
Tips for Optimal Performance
- Monitor Humidity and Temperature:
- Continuously track temperature and humidity levels using probes and built-in sensors. Ensure that the delivered air is warmed to body temperature (around 37°C) and that humidity levels remain adequate (30-34 mg/L).
- Stay Vigilant About Patient Comfort:
- Regularly assess the patient for signs of discomfort, such as airway dryness, excessive secretions, or coughing. Adjust humidification and ventilation settings as necessary to keep the patient comfortable and safe.
- Maintain a Backup System:
- Always have a backup humidifier or HME, spare tubing, and filters ready in case of equipment malfunction or failure. Keep manual resuscitators (Ambu bags) nearby for emergencies.
- Use Heated Wire Circuits to Prevent Rainout:
- Heated wire circuits help maintain consistent temperatures in the tubing, reducing condensation and preventing water buildup.
- Follow Manufacturer Guidelines:
- Adhere to the manufacturer’s instructions for maintenance, calibration, and replacement of equipment. Regularly updating and servicing the equipment ensures its longevity and optimal performance.
- Respond Quickly to Alarms:
- Set ventilator alarms appropriately and respond immediately if any alarms are triggered. This can help identify leaks, blockages, or other issues early on before they affect patient care.
By implementing these steps and troubleshooting effectively, you can ensure that the humidifier-ventilator system operates efficiently, providing safe and effective respiratory support to patients.
References
1. Lellouche F, Taillé S, Lefrançois F, et al. Humidification performance of 48 passive airway humidifiers: comparison with manufacturer data. Chest. 2009;135(2):276–286. doi: 10.1378/chest.08-0679.
2. Sottiaux TM. Consequences of Under- and Over-humidification. Respiratory Care Clinics of North America. 2006;12(2):233–252. doi: 10.1016/j.rcc.2006.03.010.
3. https://rc.rcjournal.com/content/respcare/57/5/782.full.pdf