Connecting a humidifier to a ventilator for optimal airway humidification.

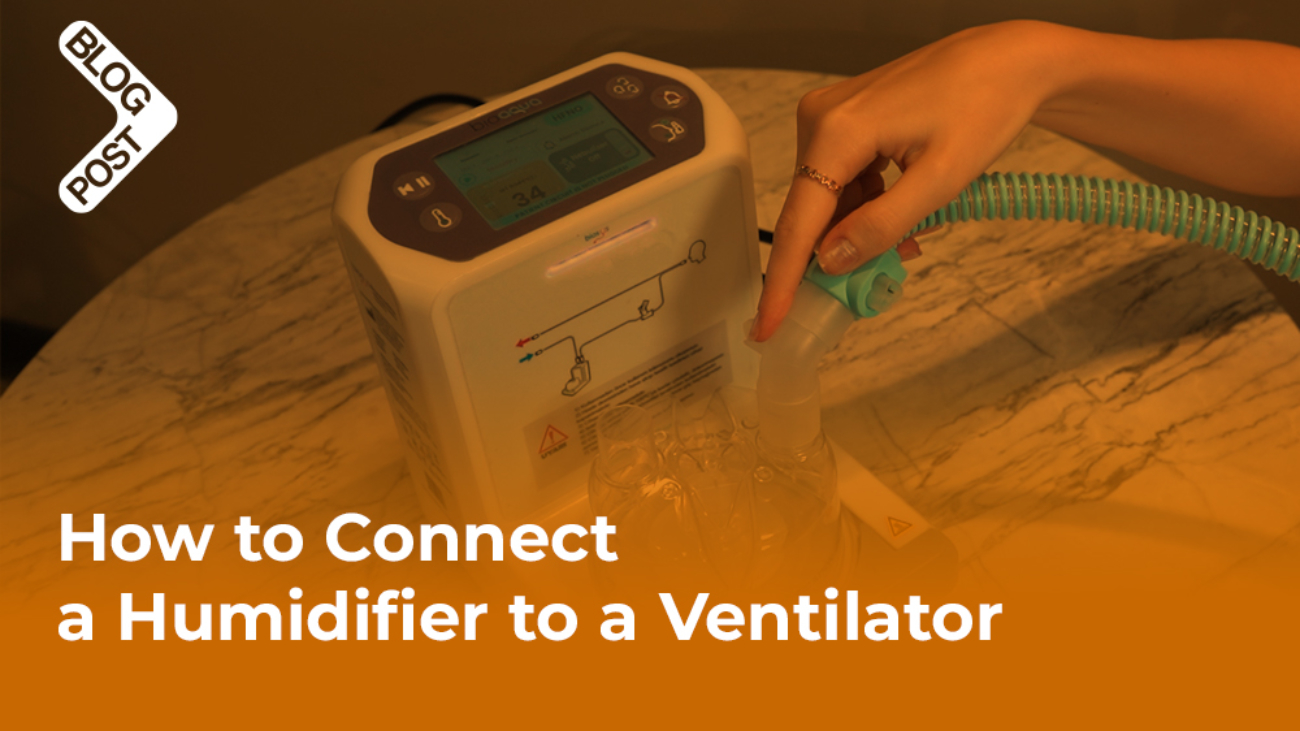
How to Connect a Humidifier to a Ventilator?

Connecting a humidifier to a ventilator is essential to maintain optimal airway humidity and improve patient comfort. Proper integration helps prevent complications like dryness and mucosal irritation. In this guide, we’ll cover the basic steps to safely and effectively connect a humidifier to a ventilator.

Preparation Before Connecting a Humidifier to a Ventilator

Before connecting a humidifier to a ventilator, it’s crucial to follow proper procedures to ensure patient safety, system efficiency, and equipment functionality. This preparation includes taking safety precautions and ensuring that all necessary equipment and tools are available and properly functioning (3).

Safety Precautions

A. Infection Control

  • Hand Hygiene: Ensure thorough hand hygiene before and after handling any ventilator or humidifier components to reduce the risk of contamination.
  • Sterile Equipment: Use only sterile or single-use components (e.g., tubing, water reservoir) to prevent bacterial contamination.
  • Closed Circuit: Keep the circuit closed to minimize the risk of infection, especially for patients who are mechanically ventilated.
  • Use of Sterile or Distilled Water: Fill the humidifier reservoir with sterile or distilled water to prevent bacterial growth in the system.

B. Monitoring and Supervision

  • Check Patient Settings: Verify the ventilator settings before connecting the humidifier. Ensure that tidal volume, pressure settings, and oxygen levels are within the required limits.
  • Monitor Temperature: Make sure that the temperature and humidity levels are set to the recommended ranges to avoid airway burns (too hot) or inadequate humidification (too cold).

C. Avoiding Condensation (Rainout)

  • Heated Wire Circuits: If using a heated humidifier, confirm that the heated wires in the tubing are functioning correctly to prevent condensation within the circuit, which can interfere with ventilation and increase infection risk.
  • Proper Tubing Positioning: Keep the tubing slightly inclined, allowing any condensation that forms to flow back into the water chamber rather than towards the patient.

D. Equipment Inspection

  • Check for Leaks: Ensure that there are no leaks in the ventilator tubing or around the connections, as leaks can lead to a loss of pressure and improper ventilation.
  • Prevent Electrical Hazards: If using an electrical humidifier, ensure that the power supply is stable and there are no exposed wires or damaged components. Use grounded outlets to prevent electrical shocks.

E. Emergency Preparedness

  • Emergency Disconnection Plan: Be prepared to quickly disconnect the patient from the ventilator if any malfunction occurs with the humidifier (e.g., overheating or water contamination).
  • Backup Equipment: Have backup equipment, such as another humidifier or emergency respiratory support (e.g., manual resuscitator), ready in case of failure.

Necessary Equipment and Tools
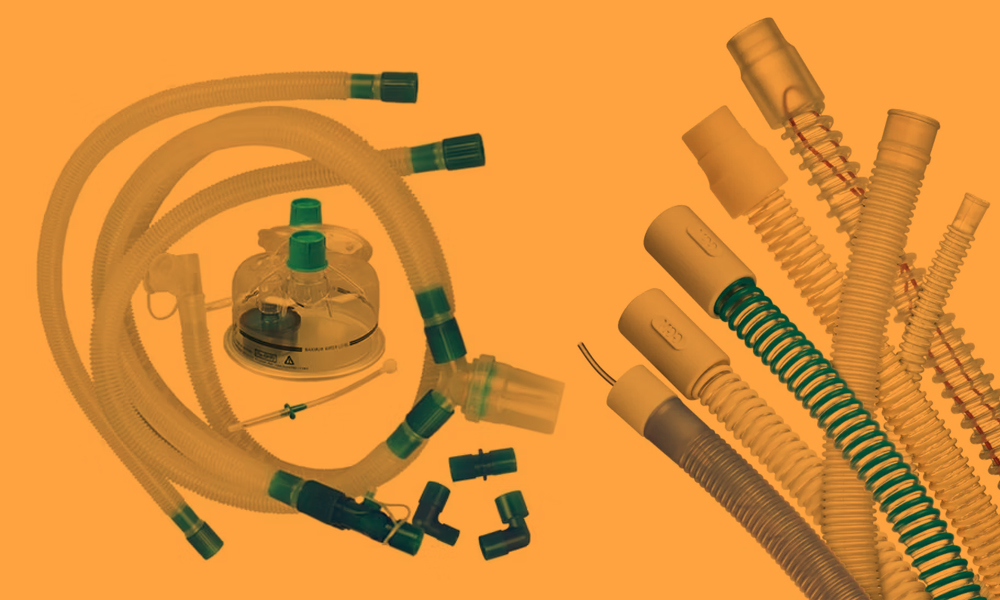
A. Ventilator-Related Equipment

  1. Ventilator Unit: The mechanical ventilator should be set up and operational, with all settings configured for the patient’s needs (e.g., tidal volume, pressure, oxygen levels).
  2. Ventilator Circuit: Includes inspiratory and expiratory tubing, connectors, and a Y-piece that connects the patient to the ventilator.
  3. Filters: Bacterial/viral filters to protect the ventilator and humidifier from contamination by microorganisms.

B. Humidification Equipment

  1. Humidifier (Heated or HME):
    • For Heated Humidifiers: Ensure the water chamber, heating element, and control unit are present and functioning.
    • For HMEs: Ensure the HME is sterile, sealed, and ready to connect between the endotracheal tube or mask and the ventilator circuit.
  2. Heated Wire Circuit: If using a heated humidifier, the tubing should have built-in heating elements to prevent condensation within the ventilator tubing.
  3. Water Reservoir: A sterile water container or chamber attached to the heated humidifier. The water level should be checked and filled as necessary before starting.
  4. Water Supply: Sterile or distilled water for use in the humidifier. Avoid tap water, as it may introduce contaminants.

C. Connection Tools

  1. Connectors and Adaptors: These are needed to attach the humidifier to the ventilator circuit and patient airway. Ensure the correct size and type (e.g., Luer-lock, Y-piece connectors) are available.
  2. Tubing Clamps/Clips: These are used to secure tubing and prevent disconnection or leaks in the circuit.

D. Monitoring Tools

  1. Temperature Probe: Used to monitor the temperature at the patient end of the ventilator circuit, ensuring the air is adequately warmed and humidified.
  2. Humidity Sensor: Some advanced humidifiers or ventilators come with built-in humidity sensors to measure and adjust the humidity levels in real-time.
  3. Oxygen Analyzer: If oxygen therapy is being administered, an oxygen analyzer is used to verify the concentration of oxygen being delivered.

E. Backup and Emergency Equipment

  1. Manual Resuscitator (Ambu Bag): For immediate manual ventilation in case of ventilator or humidifier failure.
  2. Backup Humidifier or HME: In case the primary humidifier malfunctions or needs to be replaced, having a backup ensures continuous humidification.
  3. Spare Tubing and Filters: Extra tubing and filters should be readily available in case of damage or contamination during setup or use (4).

In conclusion, proper preparation before connecting a humidifier to a ventilator involves thorough inspection of equipment, adherence to infection control protocols, and careful monitoring of the system to ensure optimal patient care. Following these steps can prevent complications such as infection, condensation, and equipment malfunction.

Step-by-Step Process for Safe Connection
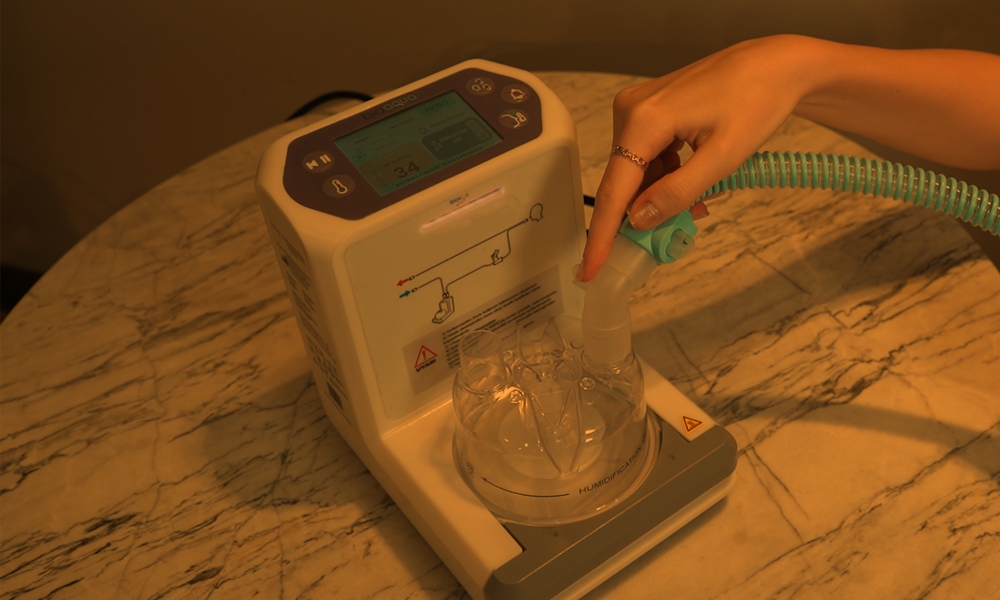
  1. Inspect the Ventilator and Humidifier:
    • Ensure that both the ventilator and humidifier are in good working condition, have been calibrated, and are set to the appropriate values for the patient.
  2. Set Up the Water Chamber:
    • For heated humidifiers, fill the water chamber with sterile or distilled water and check that the heating element is operational.
  3. Connect the Circuit:
    • Attach the inspiratory and expiratory tubing to the ventilator. Ensure all connectors are tight and secure to avoid air leaks.
  4. Insert the HME or Humidifier:
    • If using an HME, place it between the ventilator tubing and the patient’s endotracheal tube, tracheostomy, or mask.
    • If using a heated humidifier, connect the tubing from the ventilator to the humidifier’s output, and from the humidifier to the patient’s airway.
  5. Check Humidification Settings:
    • Set the desired temperature and humidity on the humidifier (for heated humidifiers). Ensure these are within the recommended range, typically 37°C for temperature and 30-34 mg/L for absolute humidity.
  6. Monitor and Adjust:
    • Continuously monitor the system, checking for appropriate temperature, humidity, and oxygen levels. Adjust the settings as necessary to ensure patient safety and comfort.

Humidifier Testing and Adjustments
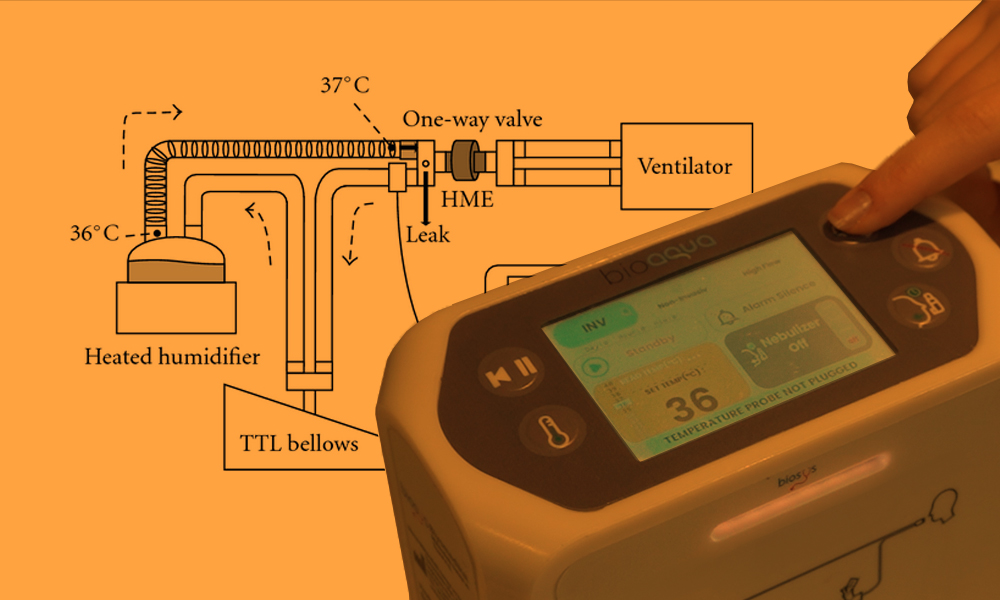
Once the humidifier is connected to the ventilator, it is essential to perform thorough testing and make necessary adjustments to ensure proper functioning. This process includes checking for leaks, adjusting humidity levels, and continuously monitoring the patient’s comfort and safety. Each of these steps is critical to ensuring the efficiency of the ventilator-humidifier system and preventing complications (2).

1. Checking for Leaks

Leaks in the ventilator or humidifier system can reduce the effectiveness of ventilation, alter pressure settings, and result in inadequate oxygen delivery. Detecting and fixing leaks early is essential for maintaining proper ventilation support.

Steps for Checking Leaks:

  1. Visual Inspection:
    • Before starting ventilation, visually inspect all connections in the circuit (e.g., between the ventilator, humidifier, and patient) for loose fittings or disconnected tubing.
    • Ensure that all connectors, clamps, and seals are secure.
  2. Leak Test on the Ventilator:
    • Most modern ventilators have a built-in leak test function. Activate the test via the ventilator’s control panel, and it will simulate pressure within the circuit to detect any air leaks.
    • The system will notify you if there is a significant leak in the circuit.
  3. Monitor Pressure Readings:
    • During ventilation, closely monitor the airway pressure. Unexplained drops in pressure may indicate a leak.
    • If the ventilator’s pressure alarms are triggered frequently (e.g., low-pressure alarms), it could signal a disconnection or leak in the tubing or humidifier system.
  4. Tighten and Secure Connections:
    • If a leak is detected, recheck the tubing, connectors, and seals. Tighten any loose connections or replace defective components (e.g., cracked tubing or worn-out connectors).
  5. Check Water Chamber and Ventilator Seal:
    • Ensure that the water chamber in the heated humidifier is properly seated and sealed to prevent leaks around the humidifier.

Final Leak Test:

  • After addressing any potential leak points, conduct a final ventilator leak test to verify that all issues have been resolved and the system is fully sealed.

2. Adjusting Humidity Levels

Maintaining appropriate humidity levels is vital for preventing airway dryness, reducing secretion buildup, and ensuring patient comfort. Too little humidity can lead to airway irritation, while excessive humidity can cause condensation in the circuit and increase the risk of infection.

Steps for Adjusting Humidity:

  1. Initial Settings:
    • Heated Humidifier: Start by setting the humidifier to a temperature of 37°C, which typically provides adequate humidification without overheating. Humidity levels should range between 30-34 mg/L (absolute humidity).
    • HME (Passive Humidifier): HMEs do not allow for direct adjustment of humidity but rely on the patient’s own exhaled moisture and heat to humidify the inhaled air. Ensure the HME is functioning properly by checking that it is warm after a few breaths.
  2. Monitoring Humidity Output:
    • Many modern ventilators and humidifiers have sensors that display real-time humidity levels. Regularly monitor these readings to ensure the humidity is within the recommended range.
    • Place a temperature probe near the patient’s airway (typically at the end of the circuit) to ensure the gas delivered is at the correct temperature and humidity level.
  3. Adjusting for Condensation (Rainout):
    • If you notice condensation forming in the ventilator tubing (often called “rainout”), reduce the temperature slightly or use heated wire circuits to keep the air warm and prevent moisture from cooling and condensing.
    • Adjust the ambient room temperature, if necessary, to reduce condensation. A colder room may cause more moisture to collect inside the tubing.
  4. Patient-Specific Adjustments:
    • Increased Humidity Needs: If the patient has thick secretions or dry airways, you may need to increase the humidifier temperature slightly (within safe limits) to add more moisture to the air.
    • Decreased Humidity Needs: If the patient is experiencing excessive secretions or condensation, decrease the temperature or switch to an HME to reduce moisture levels.

3. Monitoring Patient Comfort and Safety

The comfort and safety of the patient are the primary concerns in mechanical ventilation. Proper monitoring ensures that the humidifier and ventilator are functioning correctly and that the patient is receiving adequate, safe care (1).

Steps for Monitoring:

  1. Observe Patient Comfort:
    • Signs of Dryness: If the patient exhibits signs of dry mouth, throat discomfort, or dried secretions, the humidity levels may be too low. Adjust the humidification settings accordingly.
    • Signs of Over-Humidification: Look for signs such as excessive secretions, coughing, or discomfort, which may indicate over-humidification. Condensation in the tubing can also suggest that humidity is too high.
  2. Monitor Respiratory Status:
    • Check the patient’s respiratory rate, tidal volume, and oxygen saturation (SpO₂) regularly to ensure that ventilation is effective and stable.
    • Watch for signs of airway obstruction, such as increased work of breathing, caused by mucus plugging due to inadequate humidity.
  3. Alarms and Ventilator Monitoring:
    • Ensure that the ventilator’s alarms are set appropriately for detecting any abnormalities in pressure, tidal volume, or oxygen levels.
    • Respond promptly to any ventilator alarms, such as low-pressure or high-pressure alarms, which may indicate issues with the humidifier, tubing, or patient airway.
  4. Temperature Monitoring:
    • Continuously monitor the temperature at the patient end of the circuit. The delivered gas should be approximately body temperature (37°C).
    • Ensure the humidifier’s heating element maintains the desired temperature and adjust if necessary to prevent overheating or under-heating.
  5. Check for Condensation in Tubing:
    • Routinely check the tubing for signs of water buildup. If condensation forms, it can obstruct airflow and affect ventilation efficiency. In case of significant water accumulation, drain the tubing and readjust the temperature to prevent further condensation.
  6. Assess Secretions:
    • Monitor the quantity and consistency of the patient’s secretions. If secretions become too thick, it may indicate insufficient humidification, requiring an increase in the humidity setting.

Patient Communication and Feedback:

  • If the patient is conscious, ask them about their comfort level. Patients on non-invasive ventilation (NIV) may report dryness or discomfort if the humidity is not sufficient. Adjust based on their feedback.

Regular Equipment Check:

  • Periodically inspect the humidifier, ventilator, and tubing to ensure all components are functioning correctly. Look for any signs of equipment failure, water contamination, or blockages in the tubing.

In conclusion, after connecting a humidifier to a ventilator, thorough testing and continuous monitoring are essential for ensuring the system’s effectiveness and the patient’s safety. Checking for leaks, adjusting humidity levels to suit the patient’s needs, and monitoring for comfort and safety ensure that the patient receives optimal respiratory support.

Adjust Humidity Levels and Troubleshooting for Humidifiers and Ventilators
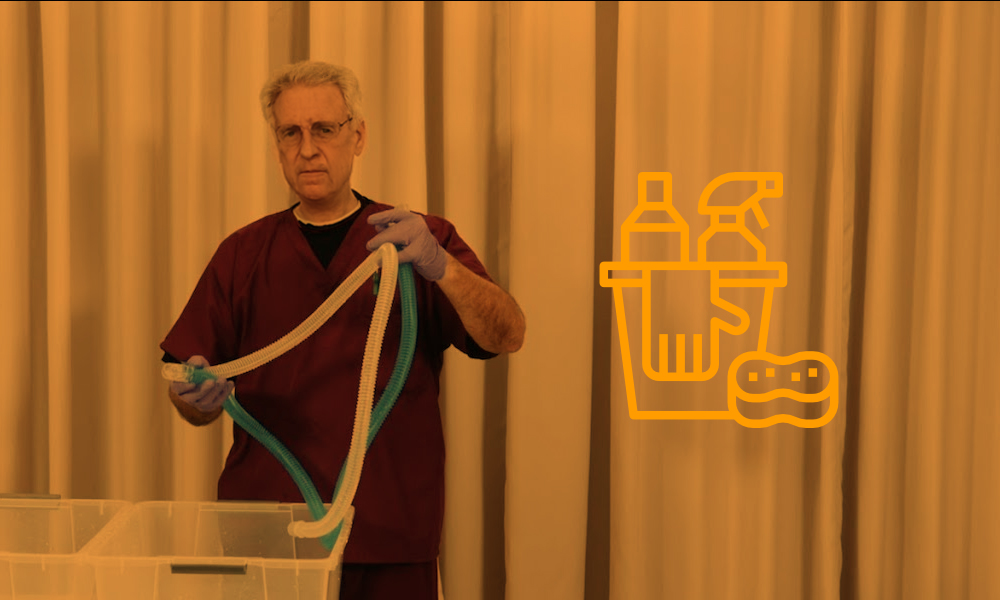
Proper maintenance and timely troubleshooting are essential for ensuring the safe and effective operation of both humidifiers and ventilators in clinical settings. Regular cleaning, inspection, and awareness of common issues can help prevent complications and extend the lifespan of the equipment.

1. Regular Cleaning and Inspection

A. Importance of Cleaning

  • Regular cleaning is vital to prevent bacterial growth, mineral buildup, and contamination in humidifiers, particularly in heated humidifiers that use water reservoirs. Ventilator circuits and components also need to be cleaned and replaced to maintain patient safety and proper equipment function.

B. Cleaning Schedule

  1. Water Chamber/Reservoir (Heated Humidifier)
    • Daily Cleaning: If using a reusable water chamber, clean it daily with mild soap and warm water, and rinse thoroughly. Follow with sterilization as per manufacturer guidelines.
    • Replace as Needed: Disposable water chambers should be replaced according to the manufacturer’s instructions (often every 24 to 48 hours).
  2. Ventilator Circuit Tubing
    • Single-Use Tubing: Replace single-use ventilator circuits after each patient or as per infection control protocols.
    • Reusable Tubing: For reusable circuits, clean them daily, and sterilize them in accordance with hospital infection control standards. Ensure thorough drying before reassembling to avoid moisture buildup.
  3. Humidifier and Filters
    • Humidifier Base: Wipe the exterior of the humidifier regularly to remove dust and dirt. Ensure the heating element is clean and free of mineral buildup.
    • Filters: Replace bacterial/viral filters regularly. Follow manufacturer recommendations, typically every 24 hours, or sooner if they become visibly dirty or blocked.
  4. Heated Wire Circuits
    • Heated wires in the ventilator circuit prevent condensation. Regularly inspect the wires for proper function and ensure that they are clean and free from any buildup or damage. Replace if necessary.
  5. Humidity and Temperature Sensors
    • Inspect the temperature and humidity sensors for accuracy and cleanliness. Clean sensors carefully and recalibrate them as per the manufacturer’s guidelines.

C. Inspection Routine

  1. Daily Visual Check
    • Inspect the tubing, humidifier, and ventilator circuit for any visible signs of wear and tear, disconnections, or leaks.
    • Ensure that all connectors are secure and that there is no condensation buildup in the tubing (especially if heated humidifiers are in use).
  2. Monitor for Alarms
    • Keep an eye on any alarms or alerts from the ventilator, as these can signal issues such as leaks, blocked tubing, or inadequate humidification.
  3. Temperature and Humidity Check
    • Use a probe to regularly check the temperature and humidity levels being delivered to the patient. Compare the actual values to the set parameters to ensure the system is working correctly.

2. Common Issues and Solutions

A. Condensation or “Rainout” in the Circuit

Problem: Condensation (rainout) occurs when humidified air cools as it travels through the ventilator tubing, leading to water accumulation. This can obstruct airflow and potentially disrupt ventilation.

Solution:

  • Use Heated Wire Circuits: Heated wire circuits prevent condensation by maintaining a consistent temperature throughout the tubing.
  • Increase Room Temperature: Ensure the ambient temperature of the room is not too low, as cooler environments contribute to condensation.
  • Check Humidifier Temperature Settings: Verify that the humidifier temperature is correctly set (typically around 37°C) to prevent cooling of the air as it travels through the circuit.

B. Inadequate Humidification

Problem: If the air delivered to the patient is too dry, it can cause airway dryness, discomfort, and increased secretion thickness, leading to blockages in the airway.

Solution:

  • Adjust Humidifier Settings: Increase the humidification level on the humidifier to ensure proper moisture is delivered. Monitor the output to ensure it matches the target humidity level.
  • Switch to Active Humidification: If using an HME, and the patient’s airways are dry, consider switching to a heated humidifier for more effective and continuous humidification.
  • Monitor Water Chamber Levels: Ensure the water reservoir has adequate sterile water. Refill or replace the water chamber as needed.

C. Leaks in the Ventilator Circuit

Problem: Leaks in the ventilator circuit can reduce the pressure and volume of air delivered to the patient, compromising effective ventilation.

Solution:

  • Check All Connections: Inspect all tubing connections, ensuring they are securely attached and free from cracks or damage.
  • Perform a Leak Test: Use the ventilator’s built-in leak test feature to check for air leaks. Fix any detected leaks by tightening connectors or replacing damaged tubing.
  • Replace Worn Components: If the tubing, connectors, or seals are worn out or damaged, replace them immediately to maintain system integrity.

D. Clogged Filters or Tubing

Problem: Filters or tubing can become clogged with secretions, dirt, or condensation, increasing airway resistance and obstructing airflow to the patient.

Solution:

  • Replace Filters Regularly: Ensure that bacterial and viral filters are replaced as per the manufacturer’s instructions or when visibly soiled.
  • Clean or Replace Tubing: If tubing becomes clogged with secretions or condensation, clean or replace it immediately to prevent airway obstruction.
  • Monitor Secretions: If the patient has thick secretions, adjust the humidity level to prevent buildup in the tubing and ensure secretion mobility.

E. Overheating or Undercooling of Humidified Air

Problem: Overheating can cause burns to the airways, while undercooling may lead to inadequate humidification and discomfort for the patient.

Solution:

  • Adjust Humidifier Temperature: Ensure the humidifier is set to a safe and effective temperature (around 37°C). Monitor the output temperature regularly using temperature probes.
  • Check Temperature Sensors: Regularly inspect and recalibrate the humidifier’s temperature sensors to ensure accurate readings.
  • Avoid Direct Sunlight or Heat Sources: Keep the ventilator and humidifier away from heat sources or direct sunlight, which could interfere with temperature control.

F. Inaccurate Temperature or Humidity Readings

Problem: The ventilator or humidifier may show incorrect humidity or temperature readings due to sensor malfunctions or calibration issues.

Solution:

  • Recalibrate Sensors: Recalibrate temperature and humidity sensors according to the manufacturer’s guidelines. This will help ensure accurate monitoring.
  • Replace Faulty Sensors: If recalibration does not resolve the issue, replace faulty sensors with new, calibrated units.

G. Humidifier Not Heating Properly

Problem: The heated humidifier fails to warm the water properly, resulting in insufficient humidification.

Solution:

  • Check Power Source: Ensure the humidifier is plugged into a reliable power source and that the heating element is functioning correctly.
  • Inspect the Heating Plate: If the heating plate is dirty or has mineral deposits, clean it according to manufacturer instructions or replace it if damaged.
  • Replace the Humidifier Unit: If the humidifier continues to malfunction, it may be necessary to replace the unit to ensure proper heating and humidification.

In conclusion, maintaining a humidifier and ventilator system requires regular cleaning, inspection, and timely troubleshooting to ensure efficient and safe operation. By following a structured maintenance routine and understanding common issues and their solutions, healthcare professionals can prevent complications, extend the lifespan of equipment, and ensure optimal patient care.

Conclusion

  1. Regular Cleaning and Inspection:
    • Daily Cleaning: Clean and sterilize reusable components like water chambers and tubing, and replace disposable parts (e.g., filters and HMEs) as needed.
    • Sterile Water Use: Always use sterile or distilled water in heated humidifiers to avoid contamination.
    • Inspect Equipment: Check all connections, tubing, and humidifiers daily for signs of wear, leaks, or blockages. Perform visual inspections and run ventilator leak tests to ensure system integrity.
  2. Common Issues and Solutions:
    • Condensation (Rainout): Prevent condensation buildup by using heated wire circuits, adjusting humidifier settings, and controlling room temperature.
    • Inadequate Humidification: Monitor and adjust humidity levels to avoid airway dryness and ensure patient comfort. Switch to a heated humidifier if needed.
    • Leaks in the Circuit: Conduct leak tests and secure all connections. Replace worn or damaged tubing and connectors.
    • Clogged Filters or Tubing: Regularly replace filters and clean tubing to prevent blockages that could compromise ventilation.
    • Overheating or Undercooling: Ensure proper temperature control by regularly calibrating sensors and adjusting humidifier settings.
    • Humidifier Not Heating Properly: Check the power source and heating elements, and replace faulty components if necessary.

Tips for Optimal Performance

  1. Monitor Humidity and Temperature:
    • Continuously track temperature and humidity levels using probes and built-in sensors. Ensure that the delivered air is warmed to body temperature (around 37°C) and that humidity levels remain adequate (30-34 mg/L).
  2. Stay Vigilant About Patient Comfort:
    • Regularly assess the patient for signs of discomfort, such as airway dryness, excessive secretions, or coughing. Adjust humidification and ventilation settings as necessary to keep the patient comfortable and safe.
  3. Maintain a Backup System:
    • Always have a backup humidifier or HME, spare tubing, and filters ready in case of equipment malfunction or failure. Keep manual resuscitators (Ambu bags) nearby for emergencies.
  4. Use Heated Wire Circuits to Prevent Rainout:
    • Heated wire circuits help maintain consistent temperatures in the tubing, reducing condensation and preventing water buildup.
  5. Follow Manufacturer Guidelines:
    • Adhere to the manufacturer’s instructions for maintenance, calibration, and replacement of equipment. Regularly updating and servicing the equipment ensures its longevity and optimal performance.
  6. Respond Quickly to Alarms:
    • Set ventilator alarms appropriately and respond immediately if any alarms are triggered. This can help identify leaks, blockages, or other issues early on before they affect patient care.

By implementing these steps and troubleshooting effectively, you can ensure that the humidifier-ventilator system operates efficiently, providing safe and effective respiratory support to patients.

References

1.   Lellouche F, Taillé S, Lefrançois F, et al. Humidification performance of 48 passive airway humidifiers: comparison with manufacturer data. Chest. 2009;135(2):276–286. doi: 10.1378/chest.08-0679.

2.   Sottiaux TM. Consequences of Under- and Over-humidification. Respiratory Care Clinics of North America. 2006;12(2):233–252. doi: 10.1016/j.rcc.2006.03.010.

3.   https://rc.rcjournal.com/content/respcare/57/5/782.full.pdf

4. http://www.frankshospitalworkshop.com/equipment/documents/ventilators/service_manuals/Fisher_Paykel_Humidifiers_700-730_-_Service_manual.pdf

1

An Overview of Humidification Mechanics

Humidification plays a pivotal role in respiratory care, especially within the context of mechanical ventilation. Ensuring optimal humidity levels is essential not only for patient comfort but also for safeguarding the respiratory tract and enhancing ventilation outcomes. The mechanics behind effective humidification are designed to mimic natural airway conditions, compensating for the absence of the upper airway’s natural humidifying functions. Understanding these mechanics helps clarify why maintaining ideal humidity levels is so critical for both acute and long-term respiratory support.

Importance of Humidification in Ventilation

Humidification is critical in mechanical ventilation for several physiological reasons. First, it prevents the drying and damage of airways. When gases are delivered during mechanical ventilation, they bypass the upper respiratory tract, which naturally warms and humidifies air. Without humidification, the cold and dry gas can dry out airways, leading to discomfort, irritation, and potential damage to the mucosal lining (1,2). This prolonged exposure can cause secretions to thicken and increase the risk of airway blockage.

Second, humidification is vital for maintaining mucociliary function. The respiratory system’s mucociliary escalator relies on a well-hydrated mucus layer to trap and remove particles and pathogens. Adequate humidity keeps the mucus moist, allowing cilia to move it effectively out of the airways. In contrast, without sufficient humidity, mucus thickens, resulting in secretion retention and a heightened risk of infection (3).

Moreover, proper humidification reduces the risk of atelectasis, where mucus plugging obstructs the airways and compromises lung function. By preventing thick secretions, humidification helps maintain open airways, optimizing ventilation and oxygenation. It also aids thermoregulation by minimizing water and heat loss through the respiratory tract, thus preventing hypothermia and dehydration, especially in patients requiring prolonged ventilation.

humidifier

Enhancing Patient Comfort and Breathing Efficiency

Humidified gases enhance patient comfort by preventing dryness in the mouth, nose, and throat, which is crucial for those on long-term ventilation. Furthermore, it reduces the risk of respiratory infections by maintaining moisture in the airways, promoting pathogen clearance, and minimizing the formation of stagnant mucus, which can harbor bacteria (4).

Finally, properly humidified air decreases airway resistance, easing the effort required for breathing. This is particularly important for critically ill patients or those on ventilators, as it facilitates better gas exchange and reduces the work of breathing (5,6).

In summary, humidification is essential to maintaining respiratory function, protecting the airways, and enhancing the overall outcomes of mechanical ventilation. It significantly improves patient comfort and reduces the risks of complications associated with long-term ventilator use.

Overview of Humidifiers and Ventilators

Mechanical ventilation and humidification are essential components in respiratory care, particularly for patients requiring long-term respiratory support. Ventilators deliver oxygen to patients, and humidifiers are used to ensure that the air provided is moistened and warmed, simulating the natural humidification process of the human body (7-10).

Types of Humidifiers for Ventilators

Humidifiers used in ventilation fall into two categories: heated humidifiers, which actively heat and moisten the air delivered by the ventilator, and heat and moisture exchangers (HMEs), which capture moisture and heat from exhaled air for reuse during inhalation.

  1. Heated Humidifiers (Active Humidification)
    • These devices actively heat and add moisture to the air delivered by the ventilator, providing optimal humidification levels.
  2. Heat and Moisture Exchangers (Passive Humidification)
    • Also called “artificial noses,” these devices trap the moisture and heat from the exhaled air and reuse it during the next inhalation, offering an easier and less energy-invasive method of humidification.

Heated Humidifiers

Heated humidifiers are devices designed to add moisture and warmth to the air delivered by mechanical ventilators to patients. This is essential because mechanical ventilation bypasses the body’s natural mechanisms for humidifying and warming air, which are usually done by the nose and upper airways. Without proper humidification, dry, cold air can irritate and damage the respiratory tract.

Heated humidifier

Key Components of Heated Humidifiers:

  1. Water Reservoir/Chamber:
    • Contains water that is heated to generate moisture.
  2. Heater Element/Heated Plate:
    • Located under the water reservoir, it heats the water to produce warm, humidified air. The heating element can be adjusted to achieve the desired temperature and humidity level.
  3. Temperature Sensors:
    • Sensors monitor the temperature of the gas at the humidifier outlet and adjust the heating to ensure optimal humidification and prevent overheating.
  4. Heated Wire Circuit:
    • The ventilator circuit (tubing) often includes heated wires that help maintain the temperature of the humidified gas as it travels through the tubing to the patient, preventing condensation (rainout).
  5. Control System:
    • Modern humidifiers are equipped with control units that regulate temperature and humidity based on patient needs, ensuring precise control over the humidification process.

How Heated Humidifiers Work:

Heated humidifiers work by heating water in a chamber to create water vapor, which is then mixed with the gas flow from the ventilator. As the gas passes over the heated water, it picks up both moisture and heat. This warm, humidified gas is delivered through the ventilator circuit to the patient’s lungs, with heated wires in the tubing helping to maintain the temperature and moisture content along the way.

This ensures that the gas remains at an optimal level for the patient’s comfort and respiratory health. The temperature at the airway is typically regulated around 37°C, mimicking body temperature, to prevent cooling and condensation in the tubing. The humidifier continuously adjusts its heating to strike the right balance between temperature and moisture for effective respiratory care (11-13).

mechanical ventilator

Benefits of Heated Humidifiers:

Heated humidifiers offer several key benefits in respiratory care. They prevent the drying of airways, which can lead to irritation, excessive mucus production, and airway obstruction. By providing proper humidification, they help keep mucus thin and mobile, reducing the risk of mucus plugging that could result in atelectasis (lung collapse) or infection.

Heated humidifiers also maintain body temperature by delivering air that matches the body’s natural warmth, minimizing the risk of hypothermia, which is crucial for critically ill patients or those on long-term ventilation. Additionally, they enhance gas exchange by supporting the normal function of the lungs and respiratory system, leading to improved oxygenation and ventilation. Finally, they significantly improve patient comfort by delivering warm, moist air, preventing dryness and irritation in the airways (11-13).

Applications of Heated Humidifiers:

  • Invasive Mechanical Ventilation:
    • Heated humidifiers are commonly used in patients on invasive mechanical ventilation, such as those with endotracheal or tracheostomy tubes. These devices bypass the upper airway, eliminating the natural humidification processes of the body (12).
  • Non-Invasive Ventilation (NIV):
    • In non-invasive ventilation, such as Continuous Positive Airway Pressure (CPAP) or Bi-level Positive Airway Pressure (BiPAP), heated humidifiers are often used to enhance comfort and maintain airway moisture (12).

Challenges and Considerations:

  1. Condensation (Rainout):
    • One of the common challenges is condensation within the ventilator tubing, which can occur when the humidified air cools down as it travels through the circuit. This “rainout” can lead to water accumulation in the tubing, which may disrupt ventilation and increase the risk of infection. Heated wires in the circuit help mitigate this issue by maintaining a constant temperature.
  2. Infection Risk:
    • Heated humidifiers require regular cleaning and maintenance to prevent bacterial growth in the water reservoir. The use of sterile or distilled water is crucial to minimize the risk of contamination.
  3. Energy Consumption:
    • Heated humidifiers require electrical power to maintain the heating element, making them more energy-dependent than other forms of humidification like heat and moisture exchangers (HMEs).
  4. Monitoring and Adjustment:
    • Regular monitoring is needed to ensure that the humidity and temperature are set at appropriate levels, tailored to the patient’s needs (17-21).

Comparison with Other Humidification Methods:

  • Heat and Moisture Exchangers (HME):
    • Unlike heated humidifiers, HMEs are passive devices that trap moisture and heat from the patient’s exhaled air and return it during inhalation. While they are simpler and do not require power, HMEs are less effective in long-term ventilation or for patients with high minute ventilation.

In conclusion, heated humidifiers are essential for ensuring optimal humidification and temperature control in mechanically ventilated patients, especially in critical care settings. Their ability to provide warm, moist air helps prevent complications associated with dry airways, improves patient outcomes, and enhances overall comfort.

Heat and Moisture Exchangers (HMEs)

Heat and Moisture Exchangers (HMEs), also known as “artificial noses,” are passive devices used in respiratory care to conserve moisture and heat in the breathing circuit of mechanically ventilated patients. Unlike active humidifiers, which add heat and water vapor to the air, HMEs capture and reuse the patient’s own exhaled heat and moisture to humidify the inhaled air.

HMEs

Key Components of HMEs:

  1. Core (Moisture Retaining Material):
    • The core of the HME is made of hygroscopic material (e.g., paper or foam) coated with salt or other substances that retain moisture and heat.
  2. Filter:
    • Some HMEs include a bacterial or viral filter to trap pathogens, offering additional protection against infections.
  3. Housing:
    • The outer shell is typically plastic and designed to fit into the ventilator circuit. It connects between the endotracheal tube or tracheostomy tube and the ventilator tubing.

How HMEs Work:

During Exhalation the warm, moist air passes through the HME. The hygroscopic material in the HME absorbs moisture and retains the heat from the exhaled air.

During Inhalation the air passes back through the HME. The retained moisture and heat from the exhaled air are transferred to the cool, dry inhaled air, warming and humidifying it before it reaches the lungs.

This cycle repeats with every breath, continuously maintaining humidity and temperature within the respiratory system (23).

Heat and Moisture Exchangers

Types of Heat and Moisture Exchangers (HMEs):

  1. Simple HME:
    • These HMEs passively trap heat and moisture from exhaled air without any active warming or humidification. They are inexpensive and widely used in short-term ventilation.
  2. Hygroscopic HME:
    • These HMEs use special materials, such as calcium chloride, which enhance moisture retention from exhaled air. They offer better humidification compared to simple HMEs.
  3. Hydrophobic HME:
    • Made from water-repellent materials, these HMEs focus on capturing heat rather than moisture. They also help reduce bacterial contamination by acting as a filter.
  4. HME with Integrated Filters:
    • These devices incorporate bacterial/viral filters to trap pathogens, offering a dual function of humidification and infection prevention.

Benefits of Heat and Moisture Exchangers:

Heat and Moisture Exchangers (HMEs) offer several benefits, particularly in terms of simplicity and convenience. They are easy to use, disposable, and require no power source or complex setup, making them ideal for short-term or emergency ventilation situations. HMEs are also cost-effective compared to heated humidifiers, with less need for maintenance, which makes them suitable for temporary or non-invasive ventilation.

Additionally, because they are single-use devices, HMEs reduce the risk of cross-contamination and eliminate the need for continuous cleaning and sterilization, unlike heated humidifiers that require regular disinfection. Their lightweight and portable design also makes them highly practical for non-invasive ventilation (NIV) and patient transport scenarios (24).

Limitations of HMEs:

Heat and Moisture Exchangers (HMEs) have several limitations, particularly in high-demand respiratory situations. Their efficiency decreases in patients with high minute ventilation, where large volumes of air need to be humidified. This can lead to airway dryness, mucus plugging, and lung complications. Additionally, excess moisture can cause the HME to become saturated, resulting in increased resistance, potential blockage, and reduced effectiveness in delivering humidified air.

HMEs are generally intended for short-term use, typically up to 48 hours, making them less suitable for long-term ventilation where heated humidifiers are more effective. They also add a small amount of dead space to the ventilator circuit, which can increase the work of breathing, especially in pediatric or neonatal patients.

Furthermore, HMEs are less effective in certain clinical situations, such as with patients who have thick or copious secretions, and are not recommended for those requiring high levels of humidity or oxygen, such as patients on high-flow oxygen therapy (23-25).

Applications of HMEs:

  1. Invasive Mechanical Ventilation:
    • HMEs are commonly used in patients on invasive ventilation, particularly those who require short-term ventilation in settings like the operating room, recovery rooms, or emergency departments.
  2. Non-Invasive Ventilation (NIV):
    • HMEs are also used with NIV devices such as Continuous Positive Airway Pressure (CPAP) or Bi-level Positive Airway Pressure (BiPAP) systems. They help improve comfort and maintain airway moisture in patients using masks for ventilation.
  3. Post-Surgical Care:
    • In post-operative settings, HMEs are useful in maintaining airway moisture for patients recovering from surgeries, especially in cases where mechanical ventilation is required for short periods.
  4. Home Care and Transport:
    • HMEs are favored in home care settings for patients on ventilators due to their simplicity and low maintenance. They are also commonly used during patient transport, where active humidifiers may not be feasible.

Comparison Between HMEs and Heated Humidifiers:

AspectHeat and Moisture Exchanger (HME)Heated Humidifier
MechanismPassively conserves moisture and heatActively adds moisture and heat
Power RequirementNo power requiredRequires electrical power
Humidity ControlLess precise; relies on patient exhalationPrecise control over humidity and temperature
EfficiencyLess effective in high minute ventilationHighly effective for long-term ventilation
CostLow, disposableHigher cost, requires regular maintenance
Infection ControlSingle-use, minimizes contaminationNeeds regular cleaning to prevent infection
ApplicationsShort-term, low-risk ventilationLong-term ventilation, critically ill patients

In conclusion, Heat and Moisture Exchangers (HMEs) are valuable tools in respiratory care, providing a simple, low-cost method for humidifying and heating the air in mechanically ventilated patients. While they are highly effective for short-term or low-ventilation needs, they have limitations in long-term or high-minute ventilation scenarios. For patients requiring prolonged ventilation, heated humidifiers may offer better humidification and temperature control.

References

  1. van Oostdam JC, Walker DC, Knudson K, Dirks P, Dahlby RW, Hogg JC. Effect of breathing dry air on structure and function of airways. Journal of Applied Physiology. 1986;61(1):312–317. doi: 10.1152/jappl.1986.61.1.312.
  2. Fonkalsrud EW, Sanchez M, Higashijima I, Arima E. A comparative study of the effects of dry vs. humidified ventilation on canine lungs. Surgery. 1975;78(3):373–380.
  3. Mercke U. The influence of varying air humidity on mucociliary activity. Acta Oto-Laryngologica. 1975;79(1-2):133–139. doi: 10.3109/00016487509124665.
  4. Ballard ST, Inglis SK. Liquid secretion properties of airway submucosal glands. Journal of Physiology. 2004;556(1):1–10. doi: 10.1113/jphysiol.2003.052779.
  5. Bryant LR. A technique for adequate humidification with mechanical respirators. The Journal of Thoracic and Cardiovascular Surgery. 1963;46:404–407.
  6. Chatburn RL, Primiano FP., Jr. A rational basis for humidity therapy. Respiratory Care. 1987;32(4):249–254.
  7. American Association for Respiratory Care, Restrepo RD, Walsh BK. Humidification during invasive and noninvasive mechanical ventilation: 2012. Respiratory Care. 2012;57(5):782–788. doi: 10.4187/respcare.01766.
  8. Cairo JM. Mosby’s Respiratory Care Equipment. 9th edition. St. Louis, Mo, USA: Mosby, Elsevier; 2013.
  9. Branson RD. Humidification for patients with artificial airways. Respiratory Care. 1999;44(6):630–641.
  10. Kacmarek RM, Stoller JK, Heuer AH. Egan’s Fundamentals of Rrespiratory Care. 10th edition.
  11. Carter BG, Whittington N, Hochmann M, Osborne A. The effect of inlet gas temperatures on heated humidifier performance. Journal of Aerosol Medicine. 2002;15(1):7–13. doi: 10.1089/08942680252908539.
  12. Nishida T, Nishimura M, Fujino Y, Mashimo T. Performance of heated humidifiers with a heated wire according to ventilatory settings. Journal of Aerosol Medicine: Deposition, Clearance, and Effects in the Lung. 2001;14(1):43–51. doi: 10.1089/08942680152007882.
  13. Solomita M, Daroowalla F, LeBlanc DS, Smaldone GC. Y-piece temperature and humidification during mechanical ventilation. Respiratory Care. 2009;54(4):480–486.
  14. Solomita M, Palmer LB, Daroowalla F, et al. Humidification and secretion volume in mechanically ventilated patients. Respiratory Care. 2009;54(10):1329–1335.
  15. Boots RJ, George N, Faoagali JL, Druery J, Dean K, Heller RF. Double-heater-wire circuits and heat-and-moisture exchangers and the risk of ventilator-associated pneumonia. Critical Care Medicine. 2006;34(3):687–693. doi: 10.1097/01.CCM.0000201887.51076.31.
  16. Lellouche F, Lyazidi A, Rodriguez P, Brochard L. Condensation in inspiratory and expiratory circuits of heated wire humidifiers, evaluation of a new expiratory, “porous”, circuit and of new humidification compensation systems. Proceedings of the 100th International Conference of the American Thoracic Society; 2005; San Diego, Calif, USA. 
  17. Gilmour IJ, Boyle MJ, Streifel A, McComb RC. The effects of circuit and humidifier type on contamination potential during mechanical ventilation: a laboratory study. The American Journal of Infection Control. 1995;23(2):65–72. doi: 10.1016/0196-6553(95)90096-9.
  18.  http://www.cdc.gov/hicpac/pdf/guidelines/HApneu2003guidelines.pdf.
  19. Wong DHW. Melted delivery hose—a complication of a heated humidifier. Canadian Journal of Anaesthesia. 1988;35(2):183–186. doi: 10.1007/BF03010661.
  20. Schumann S, Stahl CA, Möller K, Priebe H-J, Guttmann J. Moisturizing and mechanical characteristics of a new counter-flow type heated humidifier. British Journal of Anaesthesia. 2007;98(4):531–538. doi: 10.1093/bja/aem006.
  21. Jones SW, Short KA, Joseph M, Sommer C, Cairns BA. Use of a new novel humidification system with high frequency percussive ventilation in a patient with inhalation injury. Journal of Burn Care and Research. 2010;31(3):499–502. doi: 10.1097/BCR.0b013e3181db51e5.
  22. Hingorani BK. The resistance to airflow of tracheostomy tubes, connections, and heat and moisture exchangers. British Journal of Anaesthesia. 1965;37(6):454–463. doi: 10.1093/bja/37.6.454.
  23. Vandenbroucke-Grauls CM, Teeuw KB, Ballemans K, Lavooij C, Cornelisse PB, Verhoef J. Bacterial and viral removal efficiency, heat and moisture exchange properties of four filtration devices. Journal of Hospital Infection. 1995;29(1):45–56. doi: 10.1016/0195-6701(95)90292-9. 
  24. Lellouche F, Taillé S, Lefrançois F, et al. Humidification performance of 48 passive airway humidifiers: comparison with manufacturer data. Chest. 2009;135(2):276–286. doi: 10.1378/chest.08-0679.
  25. Martin C, Perrin G, Gevaudan MJ, Saux P, Gouin F. Heat and moisture exchangers and vaporizing humidifiers in the intensive care unit. Chest. 1990;97(1):144–149. doi: 10.1378/chest.97.1.144.
The Crucial Role of Humidification and Temperature Control in Respiratory Care

Breathing Easy: The Crucial Role of Humidification and Temperature Control in Respiratory Care

Humidity and temperature control have long been standard care procedures in mechanical ventilation. It has been stated in many articles published over the years that dry gases damage the airways. For this reason, external humidification and heating devices are used in respiratory care to tolerate the lack of natural humidification factors. Reservoirs, wires, heating devices and other systems have become standard equipment in intensive care units.

Controlling Humidity and Temperature in Respiratory Care

One of the important functions of the respiratory system is to ensure heat and moisture exchange in the inhaled air. The nasal connective tissue, which is the first organ of inspiration, has many capillaries. These are responsible for increasing the moisture-carrying capacity of the inhaled air by heating it.

The air passing through the nose and descending into the respiratory tract reaches a temperature of 37°C and 100% relative humidity. Cells in the respiratory tract maintain the mucosal layer, which traps pathogens and is an interface for moisture exchange. However, moisture capacity is more limited in the lower respiratory tract. Therefore, poor humidification after endotracheal intubation causes potential damage to the respiratory epithelium; this is manifested by increased work of breathing, atelectasis, thick and watery secretions, and cough and/or bronchospasm.

While it is controversial whether additional heat and humidity are always necessary in cases such as non-invasive mechanical ventilation where the upper airway is not bypassed, active humidification is always recommended. Active or passive humidifier systems are used in patients on mechanical ventilation.

The Importance of Maintaining Proper Respiratory Care Conditions

While humidification is mandatory in tracheostomy or intubated patients, this is optional in non-invasive ventilation. Humidifying the airway of a patient under ventilation support is one of the important interventions of the intensive care process. An inappropriate humidifier type and setting can damage the airway and increase respiratory workload, leading to adverse outcomes. The choice of humidifier may vary depending on clinical situations, and healthcare professionals should be aware of its advantages and disadvantages when choosing the appropriate medical devices.

Challenges In Achieving Optimal Conditions

Respiratory care’s dynamic and diverse nature creates challenges in achieving optimal conditions. Traditional methods frequently lack the precision required to tailor conditions to the needs of individual patients. Variations in environmental factors, patient-specific requirements, and the requirement for real-time adjustments add to the difficulties. Inconsistent humidity and temperature control can result in discomfort, poor therapeutic outcomes, and a higher risk of respiratory complications.

Solutions for Keeping Good Conditions

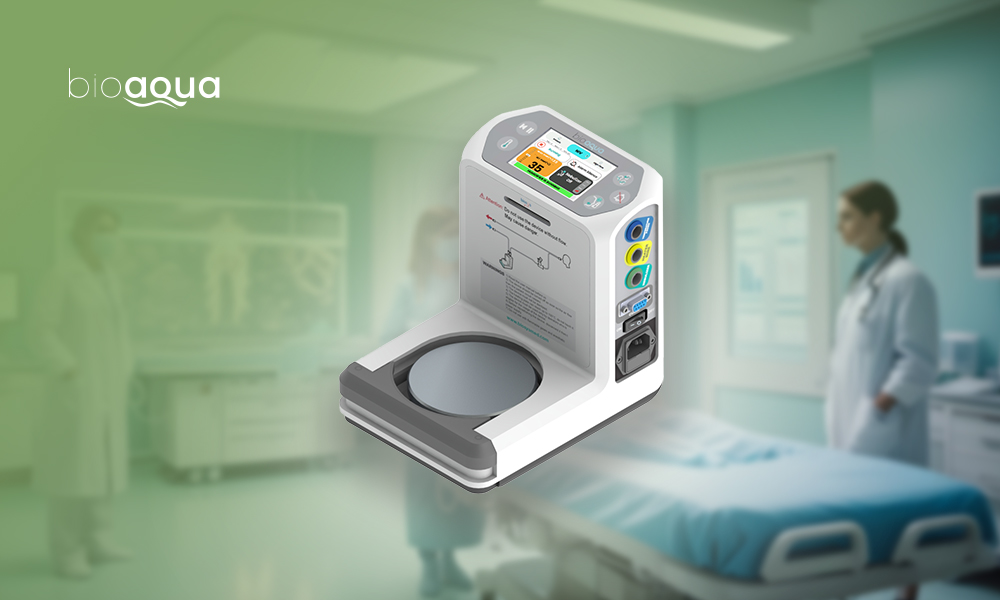
Innovative solutions in healthcare technology, such as the Bioaqua humidifier, address the challenges of maintaining proper respiratory care conditions. These devices include various features designed to optimize humidity and temperature levels, resulting in a comfortable and practical therapeutic environment for patients.

Bioaqua’s adjustable humidity control settings enable healthcare providers to tailor treatment plans to individual patient requirements. Incorporating innovative technology allows for remote monitoring and adjustments, allowing for a more proactive approach to patient care. The device’s user-friendly interface makes it accessible to healthcare professionals and patients, improving the overall respiratory therapy experience.

The Bioaqua humidifier has temperature control that is seamlessly integrated and maintains an optimal temperature range. This is achieved by utilizing advanced heating elements and thermal control systems. These technical features work together to help the device provide a tailored and responsive approach to humidity and temperature control in respiratory care.

Impact on Respiratory Conditions Examples

COVID-19 patients are among the patient groups for which invasive or non-invasive ventilation is most frequently used. Kumar et al. (2021) recommend in their article that active heat and humidification improve functions by clearing secretions from the airway in COVID-19 patients. They stated that this increased the patient’s comfort and improved NIV tolerance.

A study was conducted in 2020 to evaluate whether heated humidified ventilation could improve the prognosis in normothermic thoraco-abdominal aortic aneurysm repair operations. In this study, patients were divided into two group: the group using heated ventilation and water blankets and the group using water blankets only. Intraoperative core temperature, coagulation functions and in-hospital mortality were analyzed in the study. As a result, less blood loss, anti-coagulant dose and in-hospital mortality were observed in the heated and humidified ventilation group.

Respiratory care is extremely important, especially in newborns. A study conducted in 2015, which investigated the effect of adding heated and humidified gas to the treatment during birth and newborn arrival on body temperatures in premature babies, showed that humidification is more effective in preventing hypothermia.

The Role of Bioaqua Humidifiers in Innovative Solutions

Bioaqua stands out as an innovator in the humidification device market. Bioaqua humidifiers are designed with advanced technologies to control humidity levels precisely, ensuring optimal patient therapeutic conditions. These devices include adjustable humidity settings, real-time monitoring, and adaptive algorithms that cater to the user’s needs. Smart technology integration enables healthcare providers to monitor and adjust settings remotely, promoting a more personalized and responsive approach to patient care.

The Bioaqua humidifier incorporates temperature regulation, addressing the challenges associated with temperature control in respiratory care. The device maintains a precise temperature range, reducing the risk of complications caused by high temperatures. Bioaqua is an invaluable asset in the respiratory care landscape due to its comprehensive approach to humidity and temperature control.

Collaboration in the Development of Effective Solutions

The advancement of advanced humidification devices such as Bioaqua demonstrates the value of collaboration among respiratory therapists, clinicians, and technology experts. These collaborations result in devices that not only meet the immediate needs of patients but also pave the way for continuous improvement in respiratory care by combining clinical expertise with technological innovation.

Incorporating the perspectives of respiratory therapists and clinicians ensures that the technology meets the practical needs of healthcare settings. The collaboration of medical expertise and technological innovation is critical for developing devices that are user-friendly, adaptable, and capable of addressing the wide range of challenges posed by respiratory conditions.

Balancing Humidity And Temperature: An Essential Factor In Respiratory Care

Harmony between humidity and temperature control is critical for patient well-being and therapeutic success in the intricate dance of respiratory care. Bioaqua humidifiers are the pinnacle of innovation in this field, with advanced features designed to meet patients’ and healthcare providers’ changing needs.

While navigating the complex landscape of respiratory health, it is clear that collaboration among respiratory therapists, clinicians, and technology experts is critical in developing effective solutions. The Bioaqua humidifier exemplifies what can be accomplished when expertise and innovation come together to create devices that revolutionize respiratory care.

We invite you to visit our website to learn more about the transformative capabilities of Bioaqua humidifiers and to experience firsthand the benefits of advanced therapeutic humidity and temperature control in pulmonary care. Take the first step towards breathing easier and learn how Bioaqua can make a difference in the lives of those who require respiratory support.

Allow Bioaqua to assist you in your pursuit of optimal respiratory health.

If you would like to get detailed information about this revolutionary device, you can browse our catalogue and get the details from the link. For our other products, follow the link.

References

  • Al Ashry HS, Modrykamien AM. Humidification during mechanical ventilation in the adult patient. Biomed Res Int. 2014;2014:715434. https://doi: 10.1155/2014/715434.
  • Michael P. Meyer, David Hou, Nazmul N. Ishrar, Ingrid Dito, Arjan B. te Pas, Initial Respiratory Support with Cold, Dry Gas versus Heated Humidified Gas and Admission Temperature of Preterm Infants, The Journal of Pediatrics, Volume 166, Issue 2,2015, Pages 245-250.e1, https://doi.org/10.1016/j.jpeds.2014.09.049.
  • Ruben D Restrepo and Brian K Walsh, Humidification During Invasive and Noninvasive Mechanical Ventilation: 2012, Respiratory Care May 2012, 57 (5) 782-788; DOI: https://doi.org/10.4187/respcare.01766
  • Rui Zhao, Jiawei Qiu, Jinlin Wu, Wenxiang Jiang, Enzehua Xie, Wei Gao, Cuntao Yu, Juntao Qiu, Effect of heated humidified ventilation on intraoperative core temperature and prognosis in normothermic thoraco-abdominal aortic aneurysm repair, Journal of Thoracic Disease, 2020, Vol 12, No 3 (March 23, 2020), doi: 10.21037/jtd.2020.01.61
  • Amarjeet Kumar, Chandni Sinha, Abhyuday Kumar, Neeraj Kumar, Ajeet Kumar, Kunal Singh, Prabhat Kumar Singh, Inefficient humidification as the cause of noninvasive ventilation failure in COVID-19 patients, Brazilian Journal of Anesthesiology (English Edition), Volume 71, Issue 6, 2021, https://doi.org/10.1016/j.bjane.2021.07.021.